Our task for this week was to learn about the different CAD softwares.
( CAD software are used for designing 2D and 3D objects for better understanding.)
-For this we had to use 3 different softwares for designing in which i selected Fusion 360, Rhino3D and Correl
-But due to problem in my laptop i could not download the two software so i started my work with Fusion 360.
-CAD software for 3D designing: Fusion 360. (You have to make a student account for availing 3 years permission)

-I will get back to you with documentation of other two softwares. Till then go through the below documentation and learn about Fusion 360.
-I installed the software. And then found a tutorial on youtube to learn about the tools of the software.
Youtube link
Design-1/
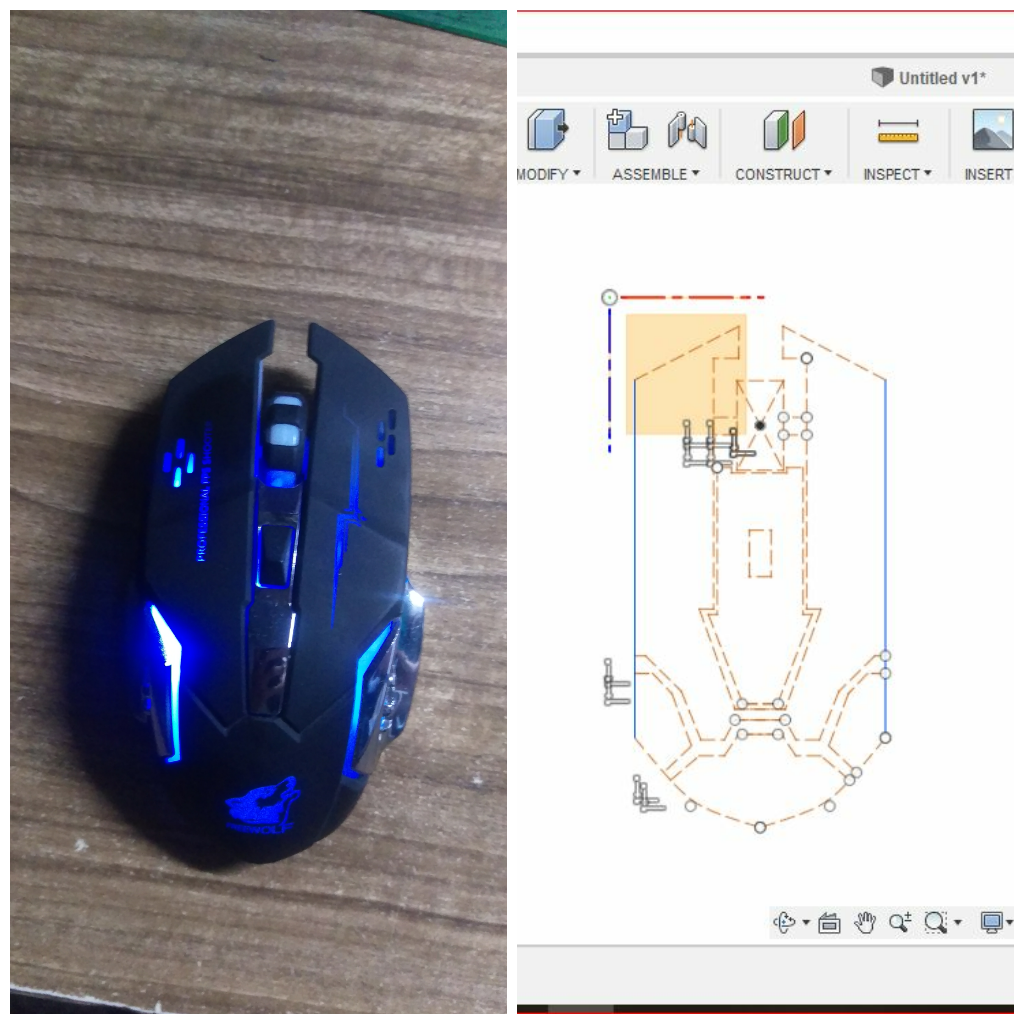
-I decided to make a 2D design of my new gaming mouse.
Step-1
-First of all for starting any design in cad make a rough sketch of it on paper. This will help you make the design in the software faster and without confusion.

Step-2
-Select the top plane to make your design.

Step-3
-Make a rectangle of the same dimension of the mouse. (140*70)

Step-4
-Use the line function and with approx distance make the front slant cut of the mouse.
-(
Shortcut key for using line function is:- "L" from keyboard)

Step-5
-Further observing the mouse and respective to design you want use the line function and make the design.
-Doing this you i got the below ddesplayed result.


Design-2
-Next, by observing the surrounding i decided to make a bowl.
Step-1
-Again a select a plane.
-This time i selected the Y-axis plane as it was the correct way to make this design.

Step-2
-After that i made a line drawing of the outside surface of the bowl.

Step-3
-Then i used the offset command.
-Made a offset of "-0.15mm".
-
Shortcur Key for OffSet:- "O"

-Now the base design was ready.
Step-4
-Time for MAGIC.
-Select the "REVOLVE" command from the 'CREATE' drop down in the bar.

Step-5
-select the recently made surface. and in the revolve setting make the 'Style' to 'Full' instead if 'Angle'.
-The angle function can be used if you want the revolve till some angle only, but here we need it full.You will see the bix with angle of 360(degree).

-And yes there is the magic. The bowl is completed.

Design-3
-3rd design i wanted to make was a mug with straw in which we can drink milk or any juices.
Step-1
-Select the top plane again as this is a flat,simple surface object.

-Make a cylinder with Height-90mm, Diameter-70mm.

Step-2
-Create a hole with the distance of 5mm from the circumference of cylinder. This will give us a tick wall of Mug.

Step-3
-Fillet the upper surface of the mug wwith dimension of - 0.25mm.

Step-4
-Now, the task was to make the handel. But it cannot be made simply on curved surface.
-So, for getting a flat surface i made a small length cylinder and placed it on the surface of wall such that little part of it intersects the wall on inside.

-Copied the cylinder at the bottom also.

Step-5
-Now, for making of handel i used the revolve function.
-Select the Front surface of the upper cylinder.
-Select the axis around which it has to revolved.
-Keep the angle of revolve "180" as we need it half till the other cylinder.

Step-6
-I used the coil command.
-Select the bottom surface of the mug. The dimensions kept for the coil is shown in the image.
-ThiS will give us the final product Mug with Straw.


Things i Learned this week
-
Using Shortcut Keys.
-
Make proper Offset as per reqirement of object.
-
Use the revolve funciton.
-
Building objects in curved surfaces.
-
Make coil

